
Blender.Design: 7 Steps to Modeling Mastery
Learn MoreCreating a Ball with a Basic Texture in Blender
Blender is a powerful 3D modeling software that provides users with the ability to create animations and visualizations. In this tutorial, we will look at the process of animating a striped ball using a variety of textures and modifiers. You will learn how to use various Blender tools to achieve the desired result, as well as master basic techniques for animating and texturing objects.
Launch Blender and delete all objects from the current scene to start with a clean slate. This will allow you to focus on creating a new project without unnecessary elements and will help avoid confusion. A clean scene will provide a better perception and ease of use of Blender tools.
Press Shift + A to add a new object to your 3D application. In the menu that opens, select the Mesh section and then Ico Sphere. This will create a new object in the shape of an icosasphere, which can be further used for various purposes in your model.
Select the new shape and press Tab to enter edit mode. Right-click and select Subdivide. In the lower right corner, open the Subdivide tab and set the Number of Cuts to 10 and Smoothness to 1. These settings will help you achieve a more detailed and smooth surface for your model.
To return to object mode, press the Tab key again. Then right-click and select the Auto Smooth option. This will help improve the display quality of your object's surface.
Select the plane with the texture and go to the modifier settings. Click the 'Add Modifier' button and enter 'Subdivision Surface' in the search bar to add this modifier. This will smooth the surface of the object and improve its visual characteristics.
In the top panel, select the preview mode to observe the changes in real time. To increase the working area, drag the upper edge of the bottom panel. After that, change the mode to Shader Editor, replacing Timeline. This will allow you to work with shaders and textures more efficiently, improving the visual quality of your project.
Hover your cursor over the border between the Material Editor and the scene. The cursor will change to a cross. In the window that opens, select Timeline. Then, in the View menu, uncheck Only Keyframes from Selected Channels. Make sure the slider is set to frame zero, and enter 120 in the End field.
To adjust the animation settings, open the menu by pressing F4 and select Preferences. In the Animation section, make sure Default Interpolation is set to Linear. If it is not, change it to Linear to achieve the expected animation effect. Properly setting interpolation will improve the smoothness and naturalness of the animation in your project.
Press Shift + A to open the Add Objects menu. Enter a ColorRamp and connect it by connecting the ColorRamp output (Color) to the (Base Color) input of the Principled BSDF node.
To add a Wave texture to your project, use the keyboard shortcut Shift + A. Connect the texture as follows: select the Wave Texture, then connect the Color output to the Fac input of the ColorRamp.
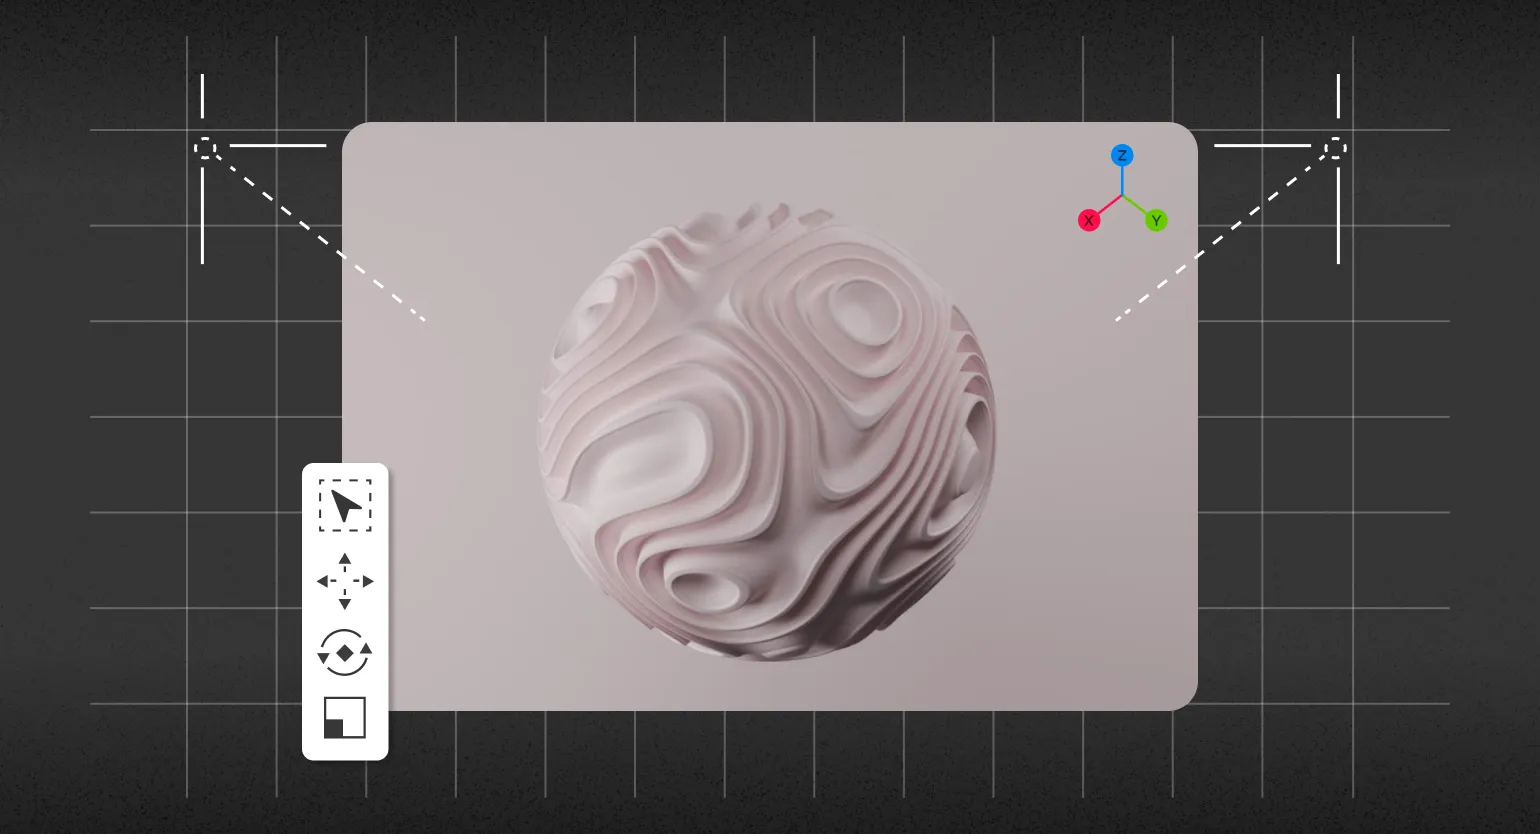
In the ColorRamp settings, change the parameter from Linear to Constant and move the white slider. This will create a striped effect on the sphere.
In the material settings for the Wave Texture, change the Phase Offset parameter to add a small white or black spot on the surface of the ball. For more precise adjustments, hold the Shift key. This will achieve the desired effect and improve the visual appeal of your 3D model.
Hover over the Phase Offset parameter and press the I key to add keyframes. Move the slider to the last frame and increase the Phase Offset value so that the texture completes three full rotations before returning to its original position. This will create a smooth animation that adds dynamism to your project.
At the initial frame, the Phase Offset value is 2.09, while at the last frame it reaches 14.66. This change demonstrates a significant fluctuation in the Phase Offset parameter during the analysis process.
Click the play button to ensure that the animation loops smoothly and looks aesthetically pleasing.
Creating a Scene and Rendering in Blender
The first step is setting up the material. Launch ColorRamp and change the gradient type from Linear to B-Spline. Move the white color to the right edge of the gradient to achieve a smoother transition. This process will help improve the visual characteristics of your material and create a more natural color scheme.
Add a noise texture using the keyboard shortcut Shift + A and link it to the wave texture. Connect the Noise Texture (Fac) output to the Wave Texture (Vector) input. Set the following parameters for the noise texture: Scale - 2, Detail - 0 and Roughness - 0. After that, check the animation and adjust the settings if necessary to achieve the desired result.
The next step involves adding Displacement. Connect ColorRamp (Color) to Mid Level, then connect Displacement to Material Output. This will create a volumetric texture for your object, adding depth and realism.
To see how your model will appear in the render, click the button in the upper right corner of the screen. The appearance of a "polygonal hedgehog" is normal for the initial settings and should not be a cause for concern.
To improve rendering quality, set the Scale value in Displacement to 0.1. In the Subdivision Surface modifier, set Viewport Levels to 2 and Render to 4. These settings will help eliminate artifacts that may occur during rendering and improve the overall visualization of the model. Proper rendering settings are essential for creating high-quality images and delivering more realistic results.
Delete the connection between the ColorRamp (Color) and Base Color in the Principled BSDF node by dragging it into an empty space in the panel. Your ball should now appear white.
To optimize your workflow, we recommend using the following material layout. This will organize information and simplify access to the necessary data, which, in turn, will improve your efficiency. By following this layout, you can easily find the materials you need and process them quickly. Remember, clear content organization is key to improving productivity and ease of use.

Create a plane for the background by selecting Shift + A, then Mesh and Plane. Increase the plane size by pressing S, then type 5 and press Enter. After that, use the combination Ctrl (or ⌘ on Mac) + A to apply the scale. This will allow you to prepare the background for further work in the 3D editor.
Add a new plane by pressing Shift + A and set the rotation angle along the X axis to 90 degrees. Move the plane along the Y axis to correctly position it relative to the ball.
Select the Y or -Y axis so that the ball overlaps the plane and creates the desired visual effect. The correct choice of axis allows you to achieve a harmonious perception of the elements in your composition.
To add a camera to the scene, use the combination Shift + A and select Camera. Adjust its position according to your preferences for displaying the scene, and then use the command View → Align View → Align Active Camera to View. This will automatically adjust the camera to the current viewing position.
If you are not satisfied with the current camera position, use the G key to move the camera along the axis. Use the mouse wheel to change the scale of the scene. To restore the default camera view, press 0 on the numeric keypad.
Go to the right panel and open the camera settings. Set the Focal Length value to 85 to achieve a more expressive and sharp framing. This will help improve the composition of your image and highlight the details of your subject.
Select a plane and increase its size so that it completely fills the frame, acting as a background. This will create the effect of depth in your scene and improve the perception of the composition. Proper use of the background helps focus attention on the main elements and gives the image more impact.
Go to the Rendering settings and select the Cycles engine instead of Eevee. Adjust the Sampling parameters, setting the Max Samples value to 10 for the preview (View) and to 60 for the final render (Render). It is also recommended to reduce the Noise Threshold to 0.2, which will help speed up the rendering process and improve image quality by reducing noise.
Add a light source to the scene using the keyboard shortcut Shift + A, then select Light and Area. Position the source so that it effectively illuminates the ball. In the object settings, increase the light power to 250 W to achieve the desired level of brightness.
Create duplicates of the light source by pressing Shift + D and place them in different corners of the scene. This will help you achieve an interesting and dynamic composition and will also improve the lighting and atmosphere of your project. Using multiple light sources will highlight key details and create deeper shadows, which will make the overall picture more expressive. Experiment with the intensity and direction of the light to achieve the desired effect.
Make sure that the color for the ball is set in the material settings. After that, select the plane and apply the same color to its material to achieve harmony in the scene. This will create a more cohesive and aesthetically pleasing visual effect.
Go to the Output section and select FFmpeg instead of PNG to save the animation. To change the save path, click the line labeled "temp." This will allow you to specify the desired directory for the saved file and optimize the animation export process.
Before rendering the entire animation, it is recommended to test one frame. To do this, use the Render → Render Image command. This will help you estimate the time required to render the entire project. This approach will help avoid unexpected delays and optimize the process.
To improve rendering efficiency, we recommend reducing the number of samples and experimenting with Tile parameters. This will optimize rendering time and improve overall performance.
In animation, the quality of individual frames is more important than in static images. Using 50 or more samples is acceptable if it produces a satisfactory result. The key is to achieve the desired effect, not strive for perfect quality on every frame.
For more detailed information on render settings in Blender, we recommend reading the separate guide. This guide will provide you with all the necessary information to help you optimize the rendering process and achieve the best results in your projects.
To achieve a successful result in your work, it is important to consider several key aspects. First of all, you need to clearly define the goals and objectives that you set for yourself. Understanding the end result will help direct your efforts in the right direction.
The second important element is planning. Creating a detailed action plan will allow you to systematize the process and avoid unnecessary waste of time and resources. Do not forget about the importance of analyzing and monitoring intermediate results; this will help you make timely adjustments to your strategy.
It is also worth paying attention to the quality of the work performed. A high standard of task execution will not only enhance your reputation but also increase the chances of successful completion of the project. Don't forget about the need for continuous self-education and professional development; this will help you remain competitive in your field.
Finally, it's important to establish effective collaboration with colleagues and partners. Teamwork and sharing experiences can significantly accelerate the process of achieving common goals. By considering all these aspects, you can significantly improve your work performance and achieve your desired success.
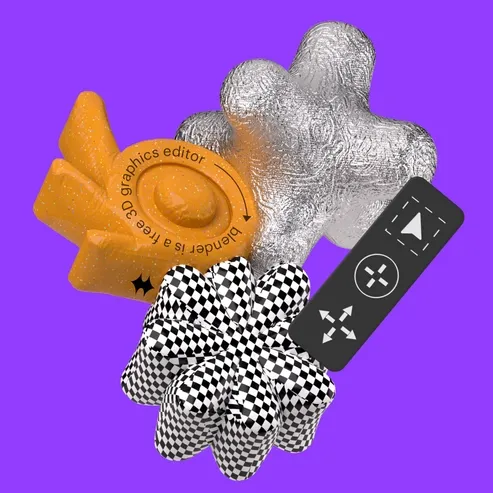
Blender: 5 steps to 3D graphics mastery
Want to master Blender and create stunning graphics? Find out 5 steps to success in 3D design!
Learn more