Contents:

Learn: Web Design 3.0
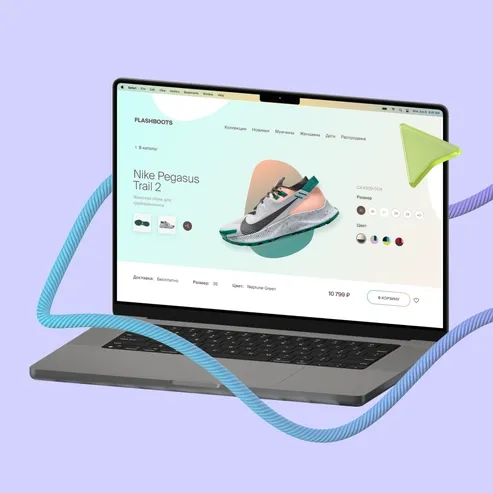
Learn moreTo create a prototype of a simple website that can be opened in a browser and discussed with a client, you need to familiarize yourself with the program's interface and its main functions. It is also important to have a basic knowledge of prototyping and UX design principles. These skills will allow you to effectively visualize ideas and ensure the usability of the site, which is a key aspect in the development process.
Skillbox offers a course in UX Design, which provides not only a solid theoretical foundation but also the opportunity to complete an internship at partner companies. In this course, you will learn the basic principles of UX design, which will enable you to create user-friendly and attractive interfaces. Let's look at the key aspects of this area.
What is a website prototype?
A prototype is a detailed diagram of a website that allows you to effectively develop the structure of pages and sections. It helps you accurately determine the location of information blocks on each page. Creating a prototype helps agree on all elements with the client, ensuring clarity and understanding of the project in the early stages of development. Using prototypes improves the quality of the final product and facilitates more successful interaction between developers and clients.
A prototype is usually developed in black and white, which allows you to focus on the structure and placement of content, rather than on the visual elements of the design. This approach helps identify functional aspects and optimize the user interface, without being distracted by color schemes and graphic details.
During a meeting with the client, a preliminary plan of the site is developed on paper. Then an interactive prototype is created, which allows you to visualize ideas and concepts. During the discussion, questions arise, and errors and inaccuracies are identified that need to be corrected. This methodical approach not only optimizes the development process but also helps save time and resources, ensuring a higher-quality result.
How to Make a Website Prototype
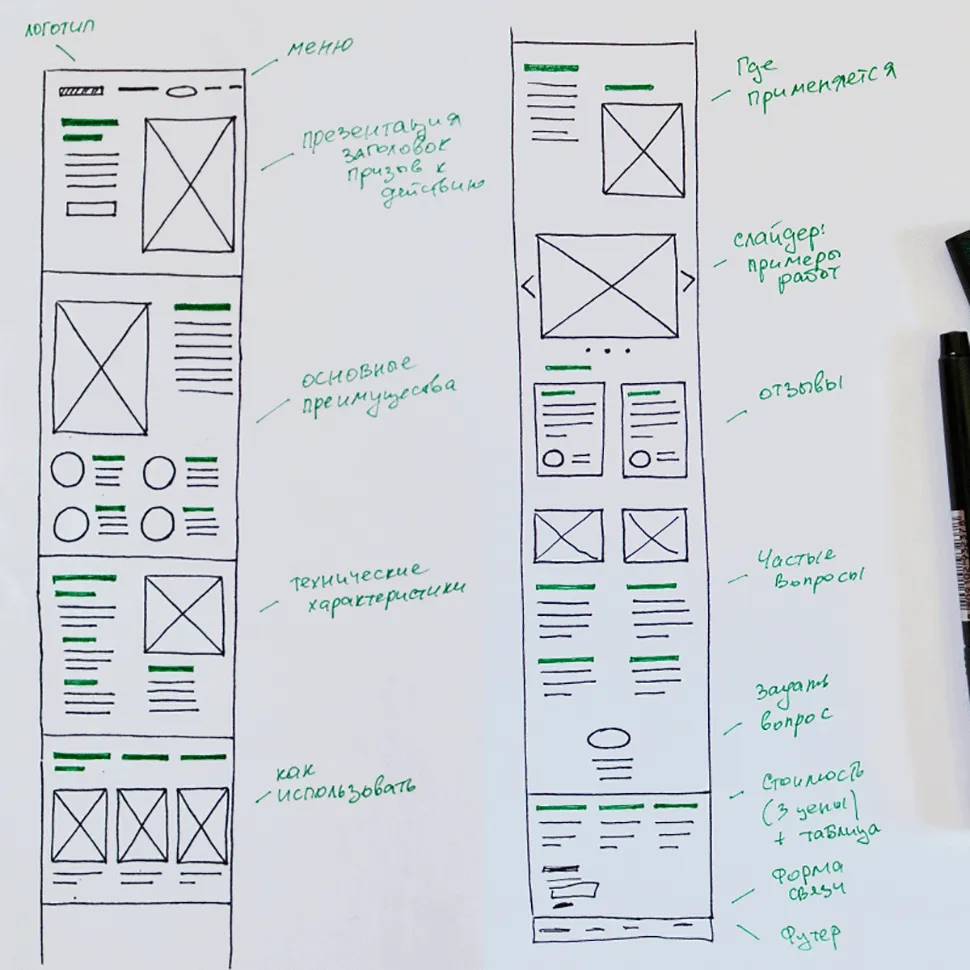
In the article "Sketching: How to Draw a Website on Paper," we developed a page structure for a company selling building blocks. Creating an effective website begins with clearly planning its structure. This allows you to visualize how the content will be organized and identify key elements that will attract the attention of potential customers. The structure should include sections such as product descriptions, benefits of using building blocks, application examples, and contact information. This approach ensures ease of navigation and helps users quickly find the information they need, which in turn increases website conversion.
A sketch is a plan for organizing information on a web page, which serves as the basis for creating a clickable prototype. Axure RP is a powerful tool for developing complex website and app layouts, making it easy for designers and developers to visualize ideas, test user interfaces, and get feedback early in a project.
To create a website prototype yourself, we recommend mastering Axure. This powerful tool allows you to effectively work with the interface and use its basic features for prototyping. Knowing Axure will allow you to visualize ideas and test user experiences even before starting to develop a full-fledged website.
Creating a new project in Axure RP
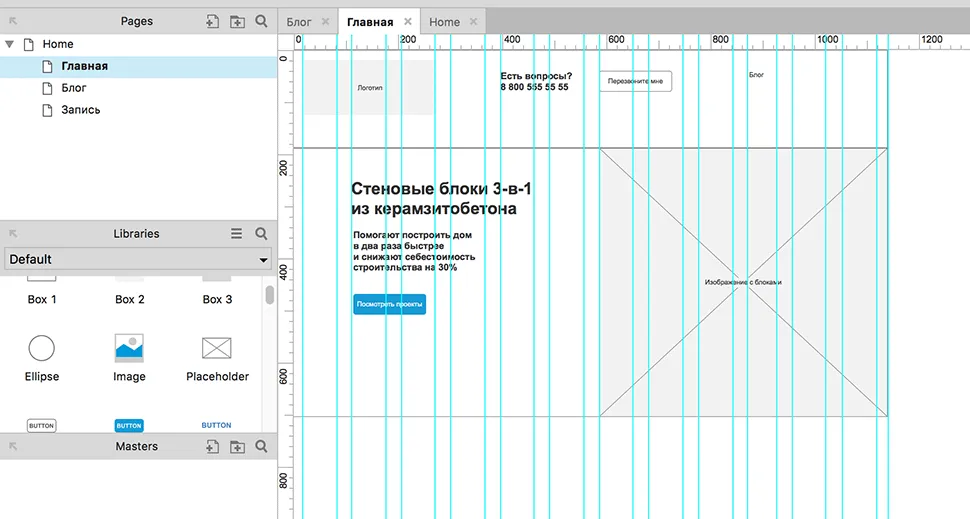
Creating a prototype for a company website with a blog requires attention to key pages. The main pages that should be included in the site structure are the home page, the blog section, and individual blog posts. The home page serves as the company's showcase and should be attractive to visitors, including information about products and services. The blog section is an important element for sharing news and expert opinions, which helps build trust in the company. Each blog post should be optimized for SEO to improve search engine visibility and attract the target audience. Properly organizing the content on these pages will help create an effective website that aligns with your company's goals.
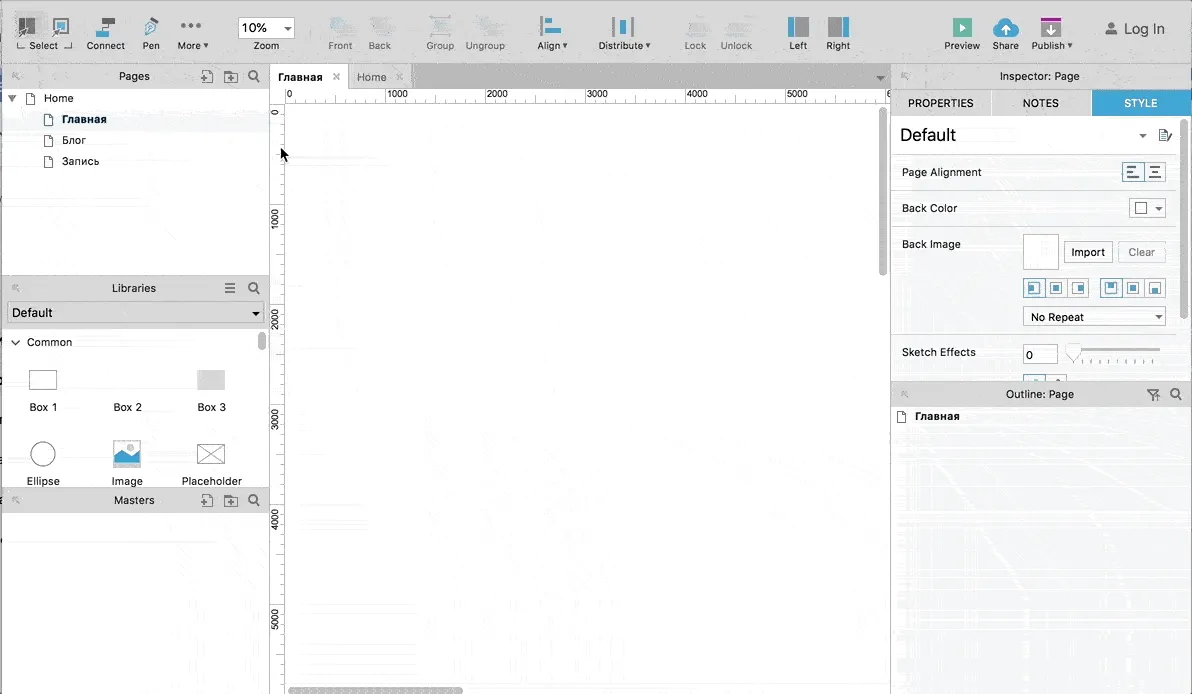
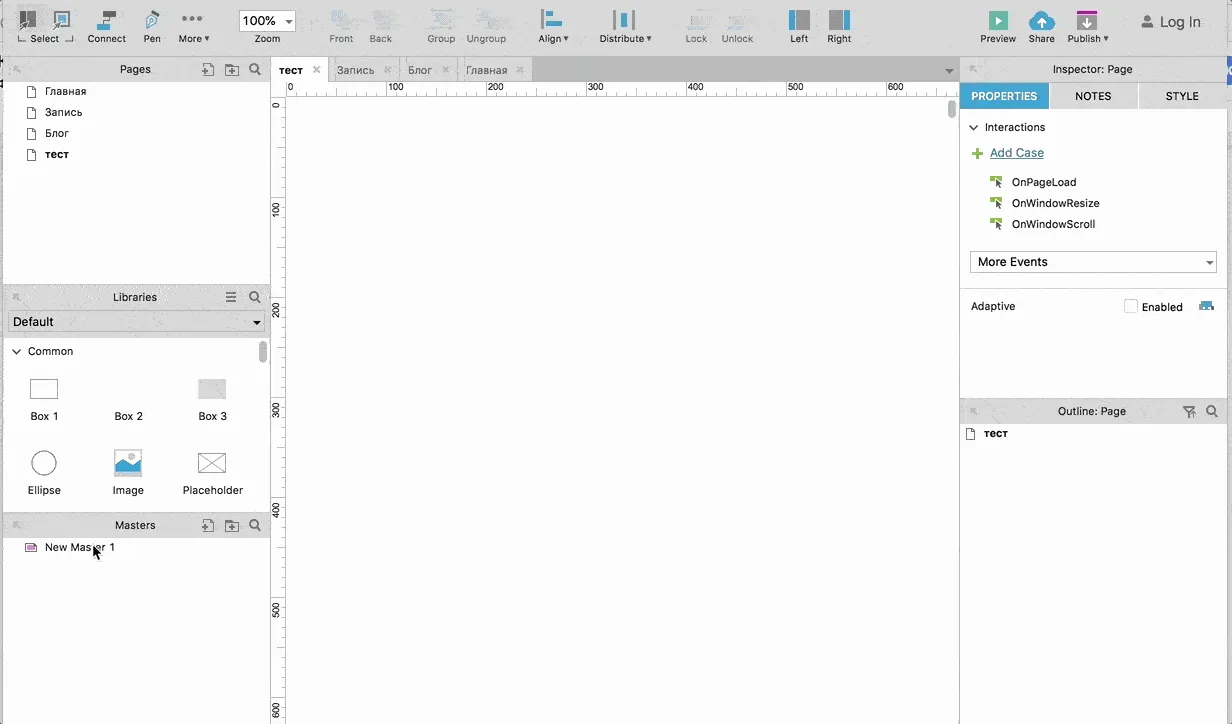
Creating a new project in Axure begins with selecting File → New. By default, the program opens a new project with three blank pages. It is recommended to rename these pages to match the structure of your future website, which will help organize the content and simplify further work on the project.

To change the page name, right-click on the page name in the «Pages» section and select the «Rename» option. This simple process allows you to quickly update your page title to improve user experience and SEO. A proper page title promotes better indexing in search engines and helps users find the information they need more easily.
Grid and Screen Width
Modern websites are designed with a variety of devices in mind, including smartphones, tablets, computers, and laptops. Each of these devices has its own unique screen resolution, requiring designers to create multiple layouts of the same website, adapted to different display sizes. This ensures optimal content display and ease of use for all users, regardless of device. Responsive design is becoming a key element in web development, improving user experience and increasing website visibility in search engines.
We will create a prototype for screens 1,140 pixels wide and wider. To ensure a concise and neat appearance for all website elements, we will use the Bootstrap 4 CSS grid framework. This will ensure harmonious content placement, improve responsiveness, and enhance usability. Using Bootstrap 4 will ensure compatibility with various devices and simplify the development process, which will significantly speed up the creation of the site.
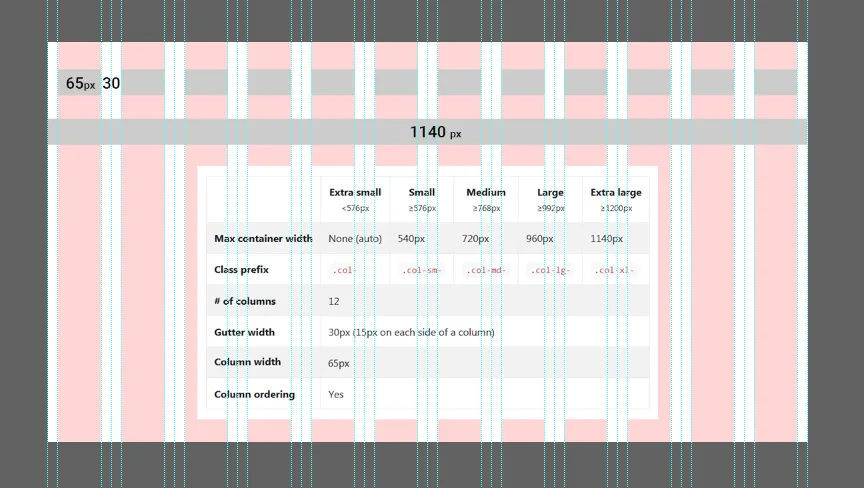
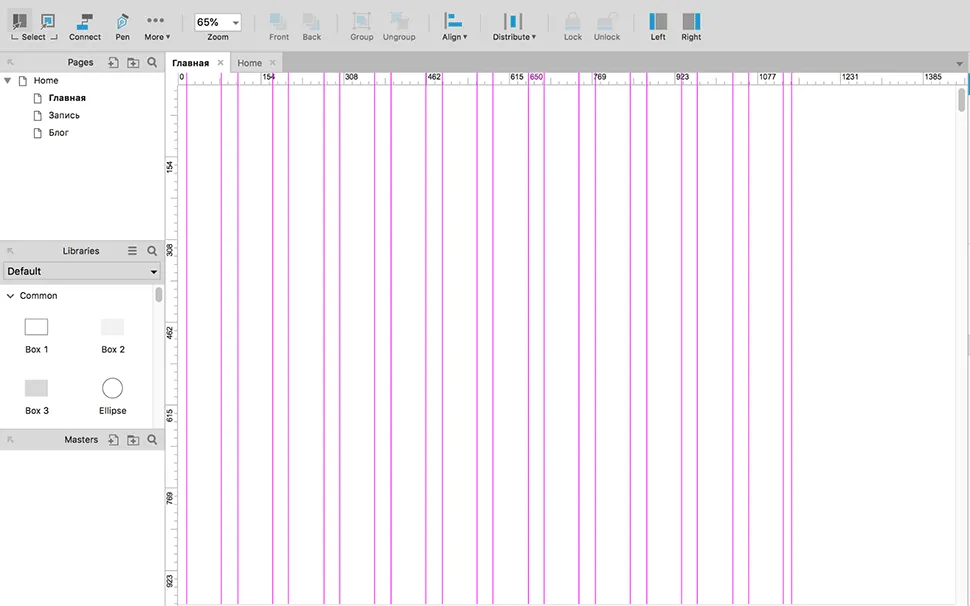
Set the desired screen width using the guide, which can be extracted from the ruler located to the right of the workspace. This process is similar to how it is done in Photoshop. Setting the correct screen width will help you better organize design elements and improve visual harmony.
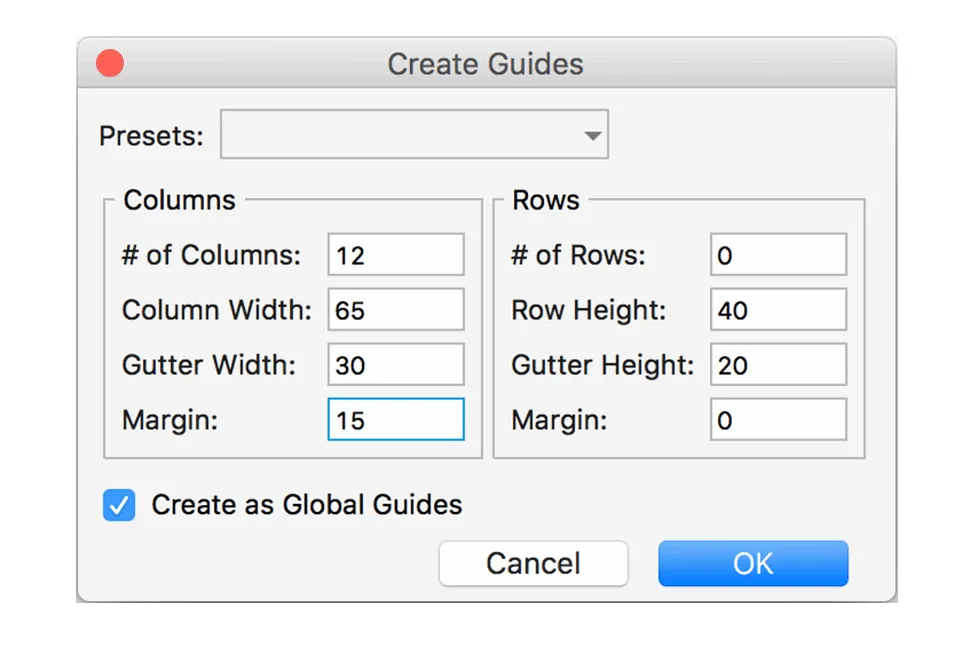
To optimize your workflow and save time, you can automatically create guides for your layout. To do this, go to the Arrange menu, then select Grid and Guides and click Create Guides. In the window that opens, set the required guide sizes. This approach allows us to significantly simplify the process of creating a layout and increase its accuracy.
As a result, we create an adaptive grid suitable for a given screen width, which ensures convenient content alignment. This allows you to optimize the display of information on various devices, improving the user experience and taking into account the features of the mobile and desktop versions.
Basic elements for the prototype
After setting up the grid, you should proceed to creating a prototype. This process uses elements from the library available in the Libraries window. Prototyping allows you to visualize the structure and functionality of a future project, which in turn helps optimize the development process and improve user interaction. It is important to consider not only visual aspects, but also usability so that the final product meets user expectations.
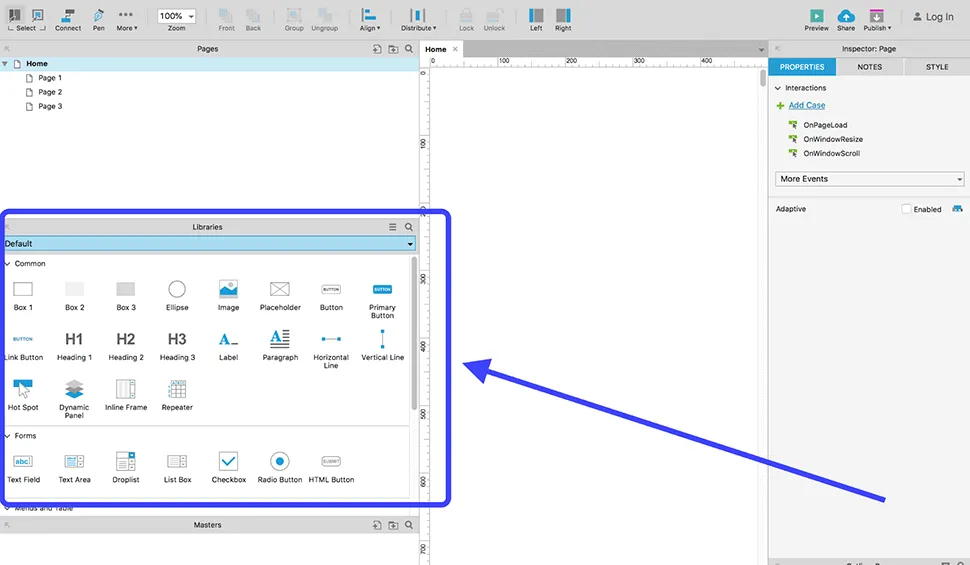
To use an element, drag it from the library window to the workspace.
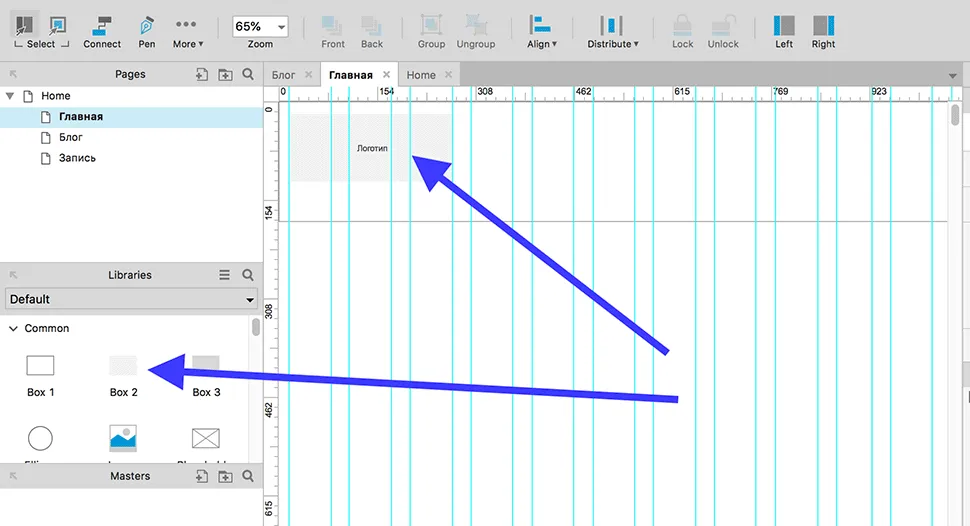
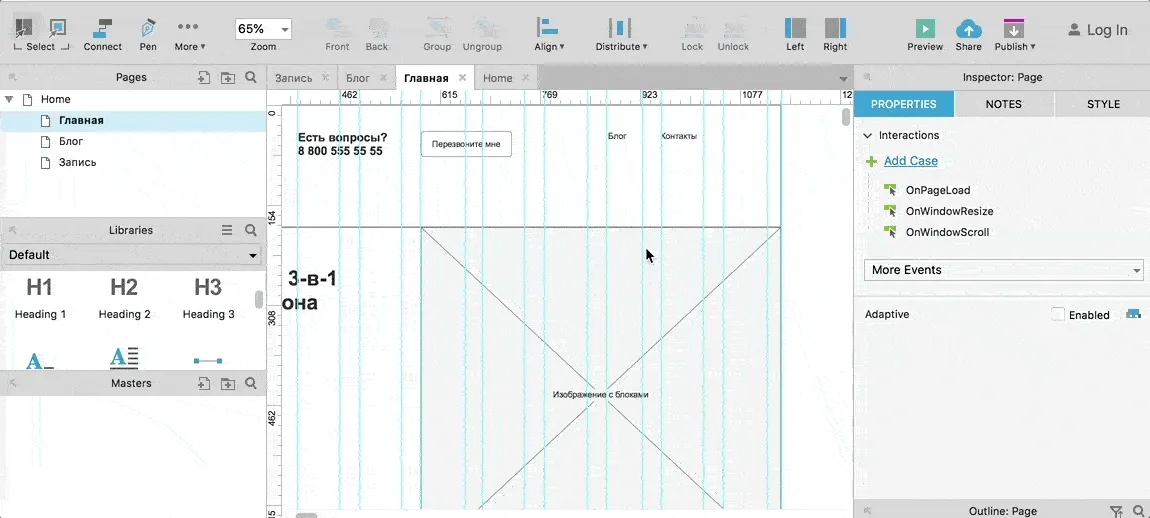
Creating a website header
A website header is a key element of its design, located At the top of the page. This block typically contains the company logo, contact phone numbers, and navigation menu. To create the header, select the Box 1 element, drag it onto the workspace, and adjust its dimensions to suit your project's needs. A well-designed header improves user experience and increases brand awareness.
We've determined the dimensions of the site header, now it's time to place the logo, phone number, and menu. The logo will be represented as a darker rectangle, which we will call Box 2. This will create a clear and organized structure, improving the user experience and navigation of the site.
The company phone number should be designed using the third-level heading element (Header 3). The button for calling the feedback form should be implemented using the existing Button element. Correct use of these elements not only improves the page structure but also promotes better user perception of information, which has a positive effect on SEO optimization.
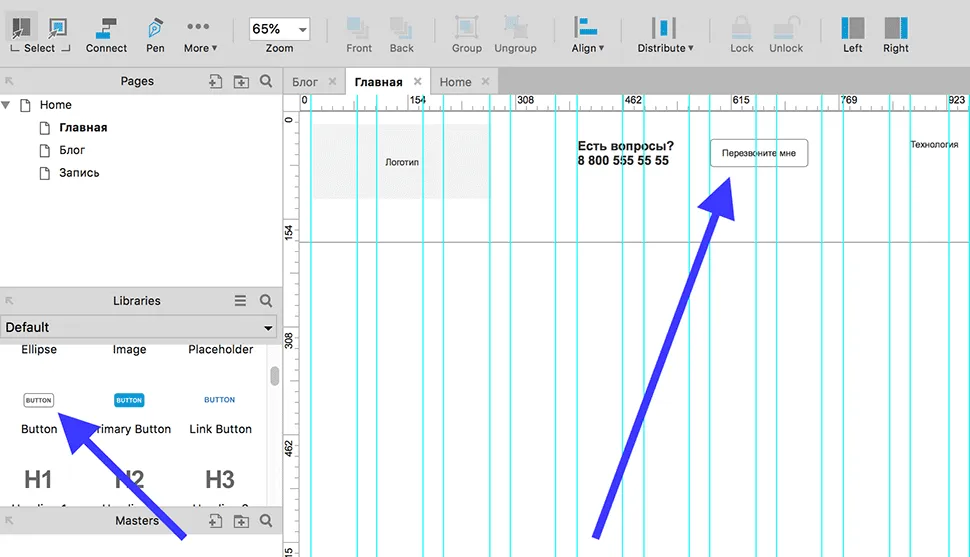
Using the Paragraph text element, we form and fill the menu area. This allows us to create a structured and understandable interface, providing convenient access to key sections of the site. Proper menu design helps improve navigation and enhance the user experience.
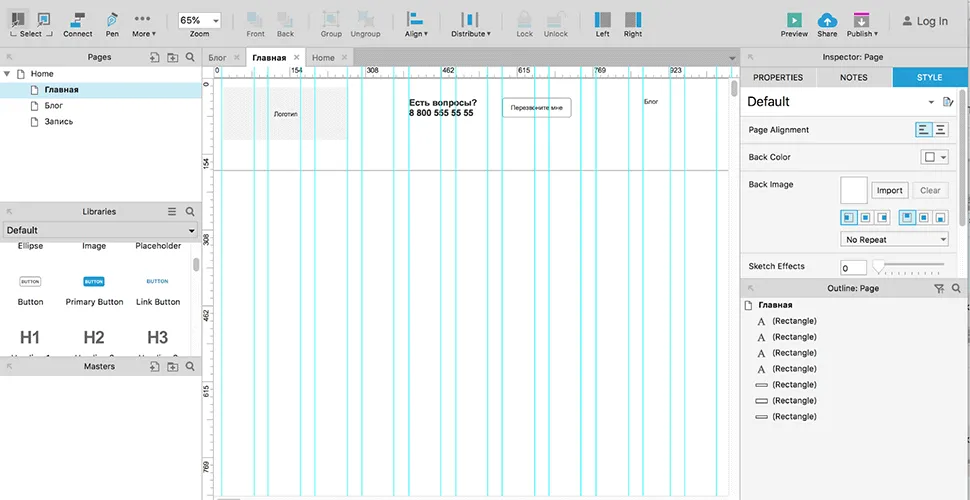
When working with prototypes containing multiple pages, using a standard header becomes ineffective. Each new page requires either creating a new header or copying it from the previous page. If changes need to be made, you will have to edit the header on each page, which significantly increases the work time. To optimize the process, designers use the Masters panel, located in the lower right corner. This allows you to create a single header template that can be used across all pages, simplifying editing and maintaining design consistency.
The Master is a unique widget that allows you to use the same content on multiple pages with just one edit. It's ideal for creating recurring elements such as the site header, footer, order form, and menu. For example, the header we designed can be converted to a Master, greatly simplifying the process of adding it to other pages and editing its content with just one click. This solution increases the efficiency of content management and improves the user experience on the site.
To select the site header, right-click and select "Convert to Master" from the context menu that appears. This process will allow you to make the site header the main one, which will simplify the management and editing of elements on all pages.
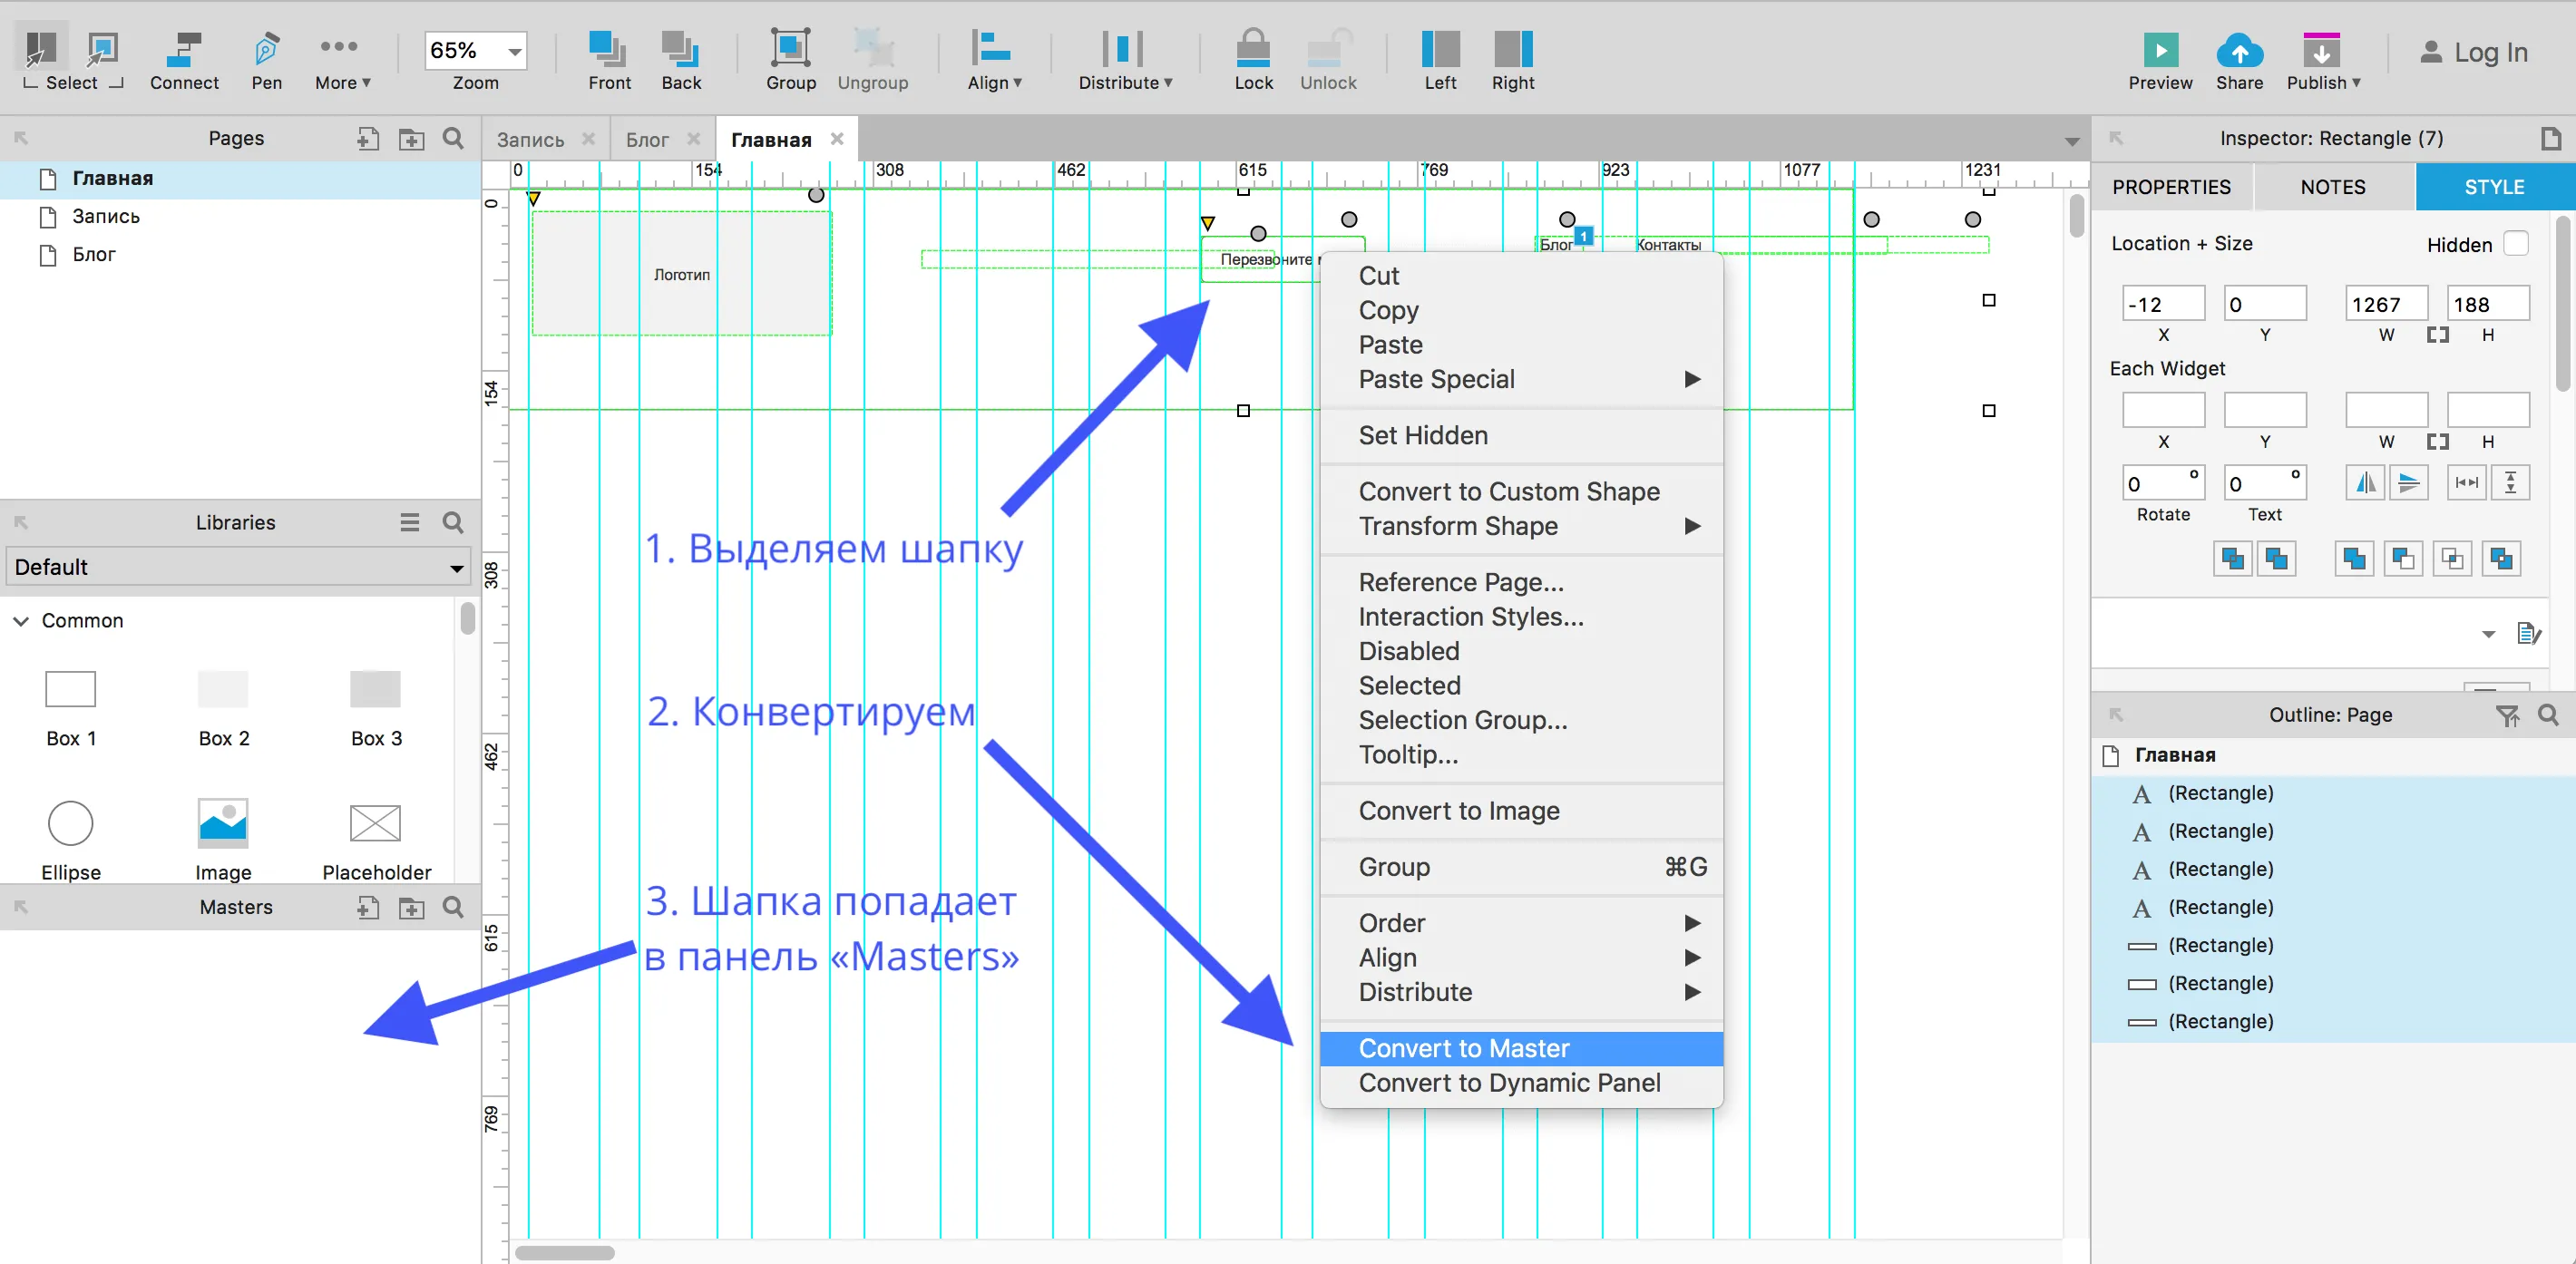
To install the header on a new page, simply drag the desired widget to its area.
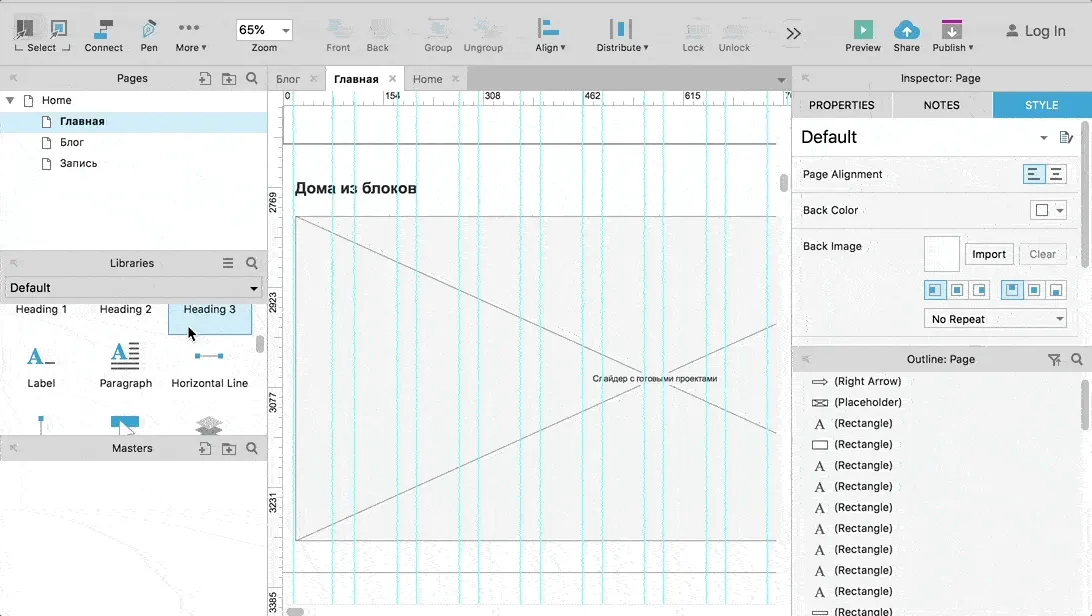
Prototype: main blocks of the site
The main blocks are formed from basic elements. The first screen should contain an attention-grabbing headline, a call to action, an interaction button, and a corresponding image. This approach ensures high efficiency and improves user experience.
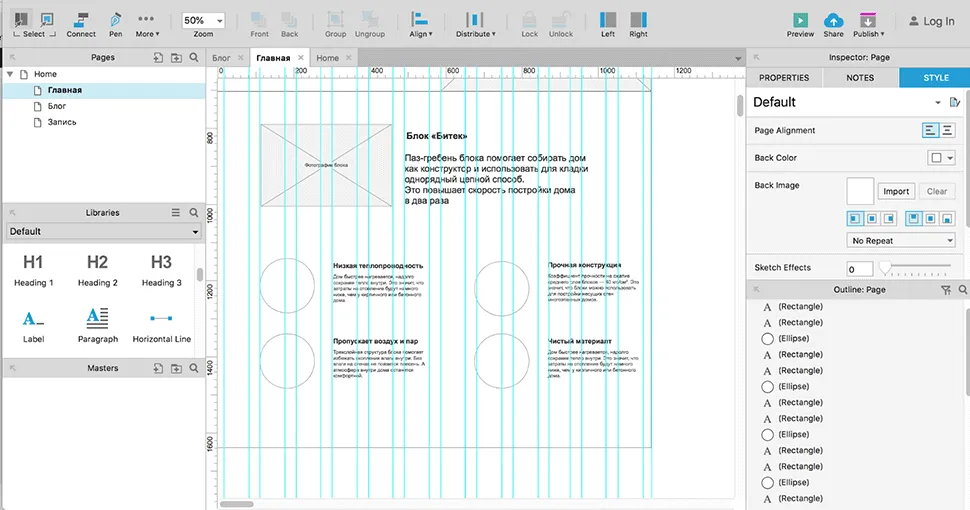
The next screen is a block highlighting the product's advantages. It will contain an image that will emphasize the product's uniqueness compared to competitors. We will use the Placeholder element to visualize the image, and the Ellipse shape for the icons. This will allow us to effectively demonstrate key features and benefits, emphasizing what distinguishes our product from similar products on the market.
We use a slider to showcase our company's projects. Controls can be easily created using horizontal lines. Simply drag a Horizontal Line onto the layout, then click on the gray circle next to the line and select the desired style. This allows you to create an attractive and convenient interface for viewing works, which improves the user experience and increases interest in the company's services.
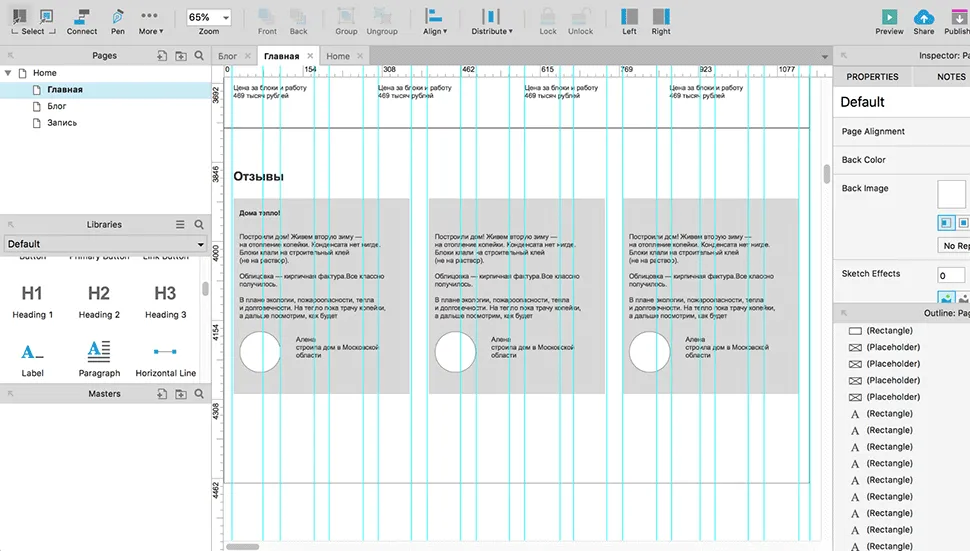
Company reviews are conveniently presented in the format of cards. This approach allows you to clearly demonstrate customer opinions and improves the perception of information. Review cards help you quickly navigate opinions, emphasizing key points and positive aspects of a service or product. This format helps build trust in the company and helps potential customers make more informed decisions. Organizing reviews in the form of cards makes them more accessible and attractive to users, which can positively impact the brand's reputation.
Creating Interactions
In Axure, each prototype element can serve as a trigger for actions, which allows you to assign specific behavioral logic to an object. This significantly simplifies the process of modeling website functionality and interactions.
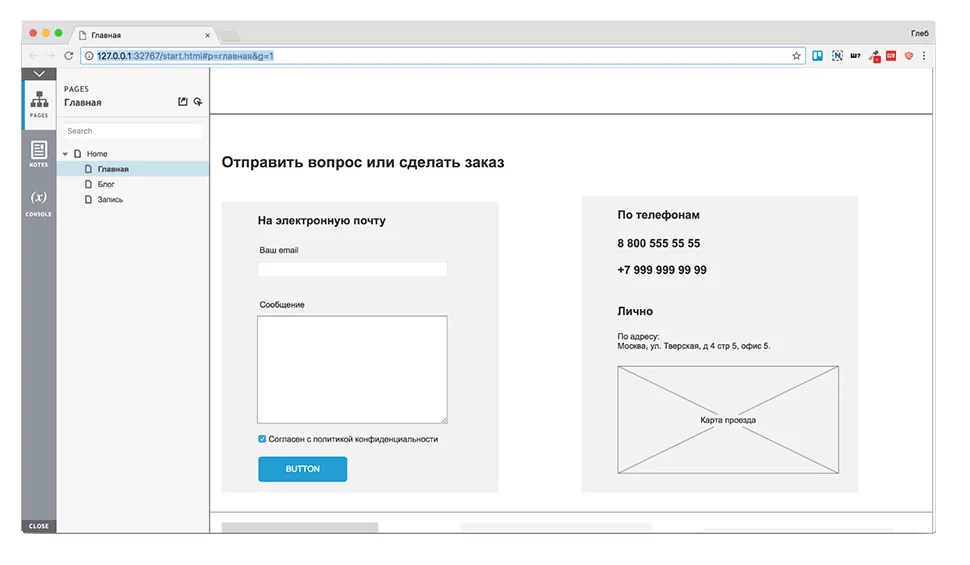
In this article, we'll discuss how to create a clickable menu in a prototype, allowing users to easily navigate the website via links in its header. First, navigate to the "Blog" section, then select the "OnClick" action in the element's Properties. This action will enable clicking on the specified links, improving navigation and user experience on the website. Creating such a menu not only simplifies access to important sections but also improves SEO, as it facilitates page indexing for search engines.
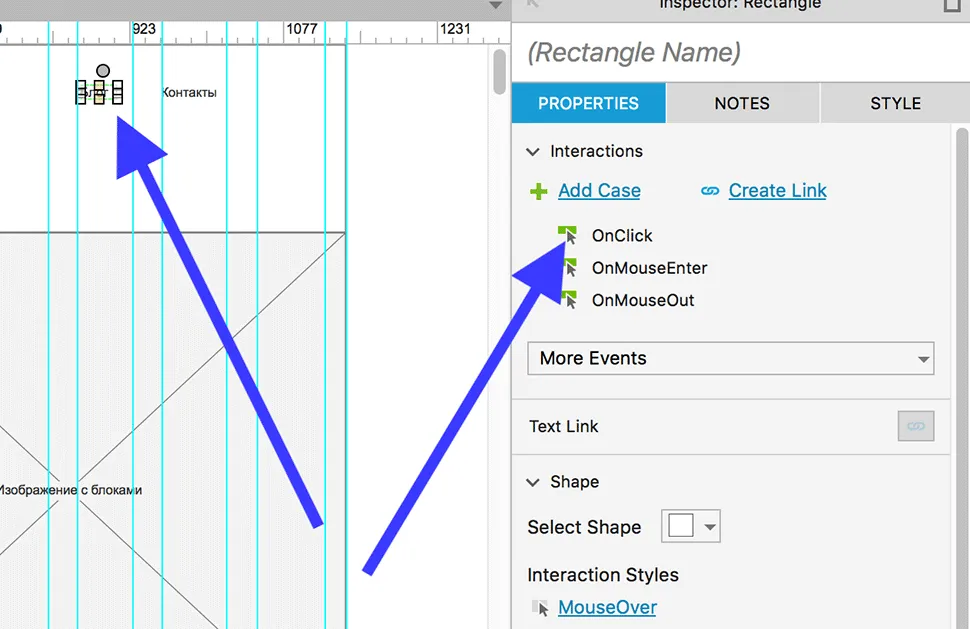
The OnClick trigger is activated when the mouse is clicked on an element, which is ideal for creating links. Let's configure it so that when clicked, the section with the blog opens in the current window. This will improve navigation and provide users with quick access to the blog's current content without redirecting them to another page.
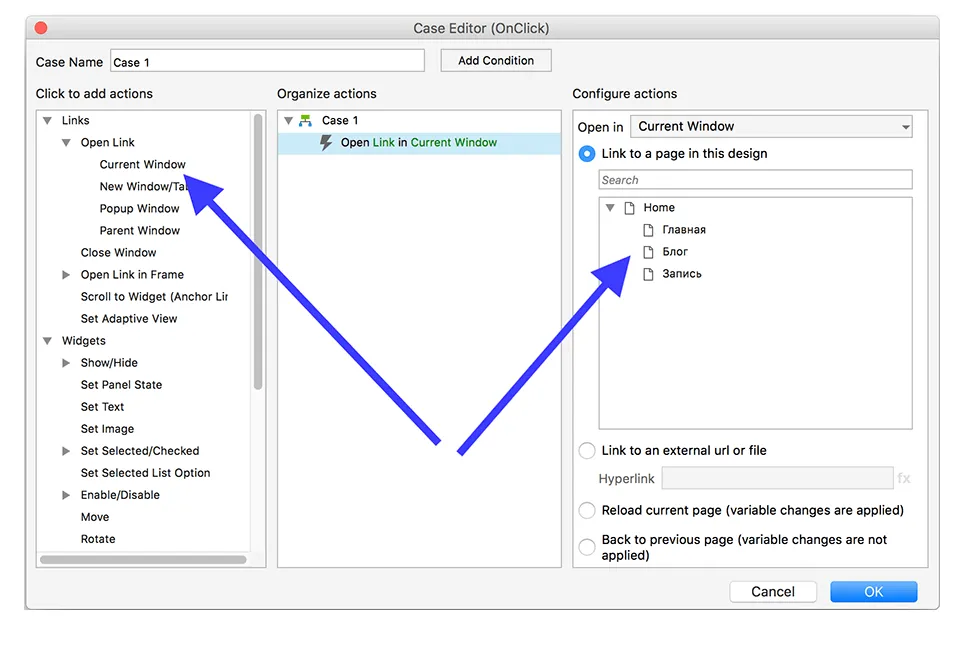
To configure how links open in your blog, select the Open Link option, then select Current Window and specify which blog page you want to open. The setup process is simple and intuitive. This will allow users to easily navigate your content, improving navigation and user experience.
View and export the prototype
The finished prototype can be instantly opened in a browser, shared via Axure servers, or exported as HTML. This allows you to effectively demonstrate and test your design, ensuring accessibility for users and stakeholders.
Explore how the prototype looks and functions in a browser using the preview feature.

This example from Axure shows a navigation bar on the right in Google Chrome. It displays the site structure and provides the ability to leave comments if needed. This feature promotes more effective interaction between project participants, allowing them to quickly find and discuss the necessary elements. Using such tools improves the development process and increases the quality of the final product.
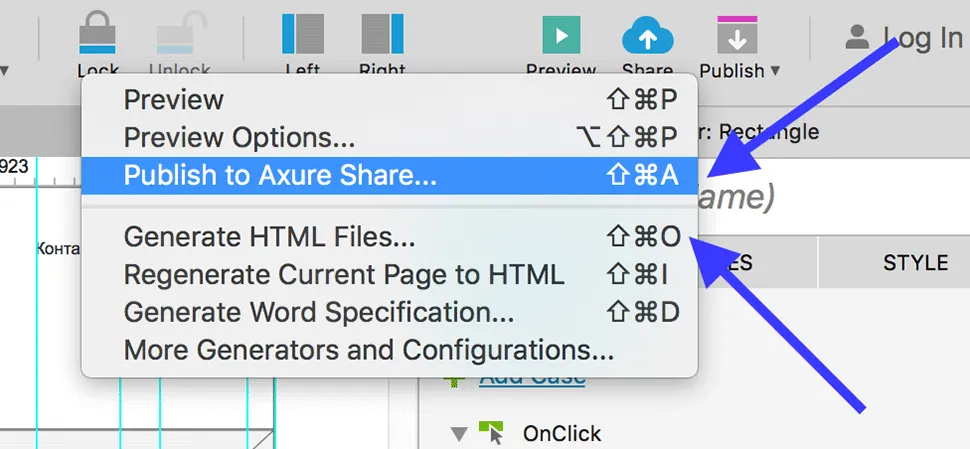
The finished prototype can be easily published to the Axure server, providing the client with access via a link. In addition, it is possible to generate HTML files that can be used both locally and on your own website. This allows you to effectively demonstrate and test prototypes in a client-friendly environment, improving collaboration and simplifying the revision process.
To publish a prototype, click the Publish button in the upper right corner and select Publish to Axure Share. If you need to download the prototype to your computer, select Generate HTML Files. These steps will allow you to effectively share and save your project.
Conclusion:
Mastering the basic functions of Axure is an accessible process, which makes this program popular not only among UX designers, but also among project managers, marketers, and copywriters. Using Axure significantly saves time and resources by facilitating the creation of interactive prototypes and improving team communication. Its ease of use makes Axure an effective tool for a variety of professionals looking to improve the quality of their projects. Axure creates a prototype while communicating with the client, allowing the designer to clearly understand the required actions. This significantly reduces the number of edits and iterations during the development process. This approach ensures more effective collaboration between teams and accelerates project delivery. Axure offers not only basic features but also the ability to create complex interactions, pop-up windows, and responsive prototypes. These tools are especially in demand among UX designers working on large and complex projects. Using Axure allows you to effectively visualize ideas and create high-quality prototypes, which improves user experience and simplifies the testing process. Become a UX designer and master the skills of working with prototypes, creating a logical website structure, and understanding user needs with the "UX Design" course from the Skillbox online university. This course will help you develop accessible and intuitive solutions, a key aspect of successful web design. Learn modern techniques and tools that will enable you to effectively design user experiences and improve interaction with your products. Start your career in UX design today.
Web Design 3.0
From day one, you'll practice on real tasks. Complete them in a convenient order and earn points to advance to the next level—just like in a game. You'll work with briefs from 7 clients.
Find out more